Showing posts with label Oracle Internet Directory. Show all posts

How to migrate users from Ebusiness suite 11i/R12 to OID

Posted by Unknown on Sunday, April 17, 2011

After Integrating the Existing E-business suite R12 Instance with Single Sign On(OID)
we will find that the existing users are NOT automatically migrated to the Oracle Internet Directory.

Later on depending upon the provisioning profile It will synchronize accordingly.(default setting is bi-directional).

step I.Use AppsUserExport to export apps user information from R12 E-Business Suite…
$java oracle.apps.fnd.oid.AppsUserExport -v -dbc $INST_TOP/appl/fnd/12.0.0/secure/VIS.dbc
-o usersr12.txt -pwd apps -g -l usersr12.log

Step II.Convert Intermediate LDIF file to Final LDIF File from OID Server…
Transfer the file usersr12.txt which we got from AppsUserExport to OID Server and
Execute the following command
$ldifmigrator “input_file=usersr12.txt” “output_file=usersr12.ldif”
“s_UserContainerDN=cn=users,dc=vectorconsulting,dc=co.uk”
“s_UserNicknameAttribute=uid”

Output
Migration of LDIF data completed.All entries are successfully migrated…
Step III.Loading Final LDIF File into Oracle Internet Directory..
a. disable the provisioning profile with oidprovtool..
$oidprovtool operation=disable ldap_host=sso.vectorconsulting.co.uk ldap_port=369
ldap_user_dn=cn=orcladmin ldap_user_password=welcome123 application_dn=”orclApplicationCommonName=VIS,
cn=EBusiness,cn=Products,cn=OracleContext,dc=vectorconsulting,dc=co.uk” profile_mode=BOTH
b. Stop OID Server using $ORACLE_HOME/opmn/bin/opmnctl stopall
c. Incase you used oidmon or oidctl then check using ldapcheck whether they are stopped..
d. Shutdown any other running OID processes manually by
oidctl connect=VIS server= instance=3 stop
and now grep the procesess and ensure that no OID processes are running..
e. Finally coming to the actual loading part.
we use bulkload for loading but before loading we should use the -check and -generate option
as follows to check duplicates and if duplicates are found in the logfile ,manually edit the LDIF file
and remove those user entries like follows
$bulkload connect=”IASDB” check=true generate=true file=”usersr12.ldif”


More Here

Courtesy:http://vivekrajendran.wordpress.com/2011/02/23/how-to-migrate-users-from-ebusiness-suite-11ir12-to-oid/
More aboutHow to migrate users from Ebusiness suite 11i/R12 to OID

what is oidpasswd tool in oracle identity management and How to Use it.

Posted by Unknown

We have to use oidpasswd in many important situations in Oracle Identity Management or in Oracle Application Server.

It can be used
1.To reset ods internal user password (ODS is the internal user for Oracle Identity Management)
using
$oidpasswd
$enter old password : *******
$enter new password : *******
$confirm new password : *******
Output:- password is reset(for ODS).

2.To reset orcladmin(super user for Oracle Identity Management)without knowing the password of which we can not do anything in OIM.
$oidpasswd connect=connect_string reset_su_password=true
it will ask for the database sys password
and ask the new password for orcladmin
if you confirm the new password your “orcladmin” password is reset.
3.To unlock orcladmin password (if password is expired)
$oidpasswd connect=connect_string unlock_su_acct=true
enter the current password of orcladmin
and the “orcladmin” user is unlocked

More Here

Courtesy:http://vivekrajendran.wordpress.com/2011/02/23/what-is-oidpasswd-tool-in-oracle-identity-management-and-how-to-use-it/
More aboutwhat is oidpasswd tool in oracle identity management and How to Use it.

Oracle Internet Directory Integration with Microsoft Active Directory

Posted by Unknown

Pre-requisites
 
1.Install Oracle Identity Management Suite 10.1.4.0.1-Choose Infrastructure and Metadata Repository option and choose components SSO,ODISRV,AND All the components except Certificate Authroity and HA).
 
2.Install Windows 2003 Server and Configure Microsoft Active Directory in that Server
 
3.Bring these Servers in the same network.

Step -I.
Login to the OID Server and invoke dipassistant(oracle directory integration and provisioning admin console) using the following options
$dipassistant -gui
login as dipadmin and password will be the same as of the orcladmin super user which you gave during the installation of OID.

In the dipadmin console from the left pane in System Objects choose Active Directory beneath the icon ConfigurationSet1 and In the right pane You will see the Express Configuration Wizard.
Enter the Active Directory Server information and in credentials enter the Superuser Account as administrator@ and in the connector name give any reasonable name and
if you press then the Import and export profile prepends the connector name and then
Click the check box Configure Access Control Policies if you want to enforce ACL.and then press OK to save this information which will start the actual integration.
On Successfull Integration dipadmin displays a success message which is given as below

Step II- Enable Bidirectional Synchronization in dipadmin for OID to AD
To achieve the bi-directional Synchronization — in dipadmin console choose the configured configset1 in the
left pane(system objects and in the right pane you will see the configured adImport and adExport(since i have given
the connector name as ad).choose those connector profile and edit and Enable those profiles for both export and Import.
If You enable both ,then synchronization of Users is bi-directional(both ways)(i.e from OID to AD and from AD to OID).
you can also note that bootstrap status(which has not started yet). I have given the screenshots below for editing
the connector profiles.

Enable AD Import connector Profile

Enable AD Export connector Profile

Step-III.
The initial migration of Users from Microsoft Active Directory to Oracle Internet Directory is called “bootstrap” process.
to do the bootstrap we need to execute the command as shown below..
Migrating initial Users from AD to OID
Confirm the bootstrap is successfull by choosing the adImport profile (connector) in the configset1(in the right pane and doing an edit and check the status) which will show you that bootstrap is successfull which i have shown below.
Check the bootstrap(migration of users from AD to OID) is successfull
Step IV:-
Now the initial Import of Users from AD to OID is complete.To start the synchronization of Users that are created both in AD and OID we need to start the odiserver(odisrv) with the configuration set 1(the one we have configured with dipadmin) we have use the following command
start the odisrv using configset1 to facilitate synchronization of Users bothways
You can also verify that synchronization has started by editing the profiles and checking the status or by checking odisrvlogs in $ORACLE_HOME/ldap/logs ,you can also find the trc and aud files for these connectors in $ORACLE_HOME/ldap/odi/logs.

Step 5:-
The final step in the configuration process is to deploy the Active Directory External Authentication Plug-in,
which validates user-supplied passwords with AD during a user login sequence.
The following steps involve execution of a Unix shell script.
$ cd $ORACLE_HOME/ldap/admin
$ sh oidspadi.sh
A series of messages and prompts will be displayed as the script executes. Sample prompt responses:
Please enter Active Directory host name: ad.vectorconsulting.co.uk
Do you want to use SSL to connect to Active Directory? (y/n) n
Please enter Active Directory port number [389]: 389
Please enter DB connect string: iasdb
Please enter ODS password: oracleadmin1
Please enter confirmed ODS password: admin01
Please enter OID host name: sso.vectorconsulting.co.uk
Please enter OID port number [389]: 13061
Please enter orcladmin password: oracleadmin01
Please enter confirmed orcladmin password: oracleadmin01
Please enter the subscriber common user search base [orclcommonusersearchbase]: cn=Users,dc=vectorconsulting,dc=co,dc=uk
Please enter the Plug-in Request Group DN:
Please enter the exception entry property [(!(objectclass=orcladuser))]:
Do you want to setup the backup Active Directory for failover? (y/n) n
Return to the Oracle Directory Manager console upon successful completion
of the plug-in deployment process and navigate to the click the Plug-In Management fork.
Make sure that the Plug-in Enable property is set for both adwhencompare and adwhenbind.
Testing
At this point, OID has been populated with an initial set of users and groups via bootstrap migration from Active directory,
and the Oracle Directory Integration and Provisioning tool has been configured such that it will use the Active Directory
Connector to keep this information synchronized. The Oracle Directory Server has been directed to authenticate users
migrated from Active Directory using the Oracle-supplied Active Directory External Authentication
Plug-in. It should now be possible to log in to Oracle SSO or any integrated applications like E-Business Suite using
one of the migrated Active Directory users with its corresponding password.
Note: The username must be of the form name@
Step VI:- open the Oracle Directory Manager and verify that Users are Imported from Active Directory by navigating
to defaut domain and cn=Users and find the users of Active Directory which i have shown below.
Verify Active Directory Users are imported in OID


More Here

Courtesy:http://vivekrajendran.wordpress.com/2011/02/23/oracle-internet-directory-integration-with-microsoft-active-directory/
More aboutOracle Internet Directory Integration with Microsoft Active Directory

Oracle Internet Directory (OID) and Weblogic installation on Linux

Posted by Unknown on Sunday, April 10, 2011

Installation manual:

http://download.oracle.com/docs/cd/E17904_01/install.1111/e12002/instps2001.htm

Basic steps:
1. Install Oracle
2. Install OID (and FMW control and ODSM)
Oracle installation is quite trivial, so let’s focus on the OID installation.
- Just remember to use the AL32UTF8 character set on the database!
You need to download:
- Oracle WebLogic Server 10.3.4.
- Oracle Identity Management 11.1.1.2.0 & 11.1.1.3.0


Actual installation:
1. Install WLS 10.3.4
- Run the installation .bin
* In 64 bit environments use: JAVA_HOME/bin/java -jar wls1034_generic.jar
* You need JDK 1.6 or later
- Create a new FMW home
- Register for security updates..
- Typical or Custom
- Change or accept the installation directories (df -h …)
- Summary => Next
- Installation…
2. Install OID 11.1.1.2.0
- unzip ../ofm_idm_linux_11.1.1.2.0_32_disk1_1of1.zip …
- ./runInstaller
- Install Software – DO NOT CONFIGURE!
- Use SAME MIDDLEWARE HOME as WLS above!
- Oracle Home Directory: This will be the directory name under Middleware Home
- Installation …
- Run root script: /middleware_home_directory/oracle_home_dir/oracleRoot.sh
- Save Summary.
3. Install OID 11.1.1.3.0 Patch Set
- unzip ../ofm_idm_linux_11.1.1.3.0_32_disk1_1of1.zip …
- ./runInstaller
- Install Software
- Use same homes !
- Next, next
- Root script
- Save Summary
OID Configuration with FMW Control and ODSM:
1. Configuration
/middleware_home_directory/oracle_home_dir/bin/config.sh
- Installer starts
- Create new domain
=> FMW Control is being configured to manage OID here
* User Name: WLS Admin user details
* Domain name
- Installation location
* Weblogic Server Directory
* Oracle Instance location, new “ASInstance” (Not actual Oracle Instance)
* Oracle Instance Name, new “ASInstance” (Not actual Oracle Instance)
- De-select others than Oracle Internet Directory
=> We will configure only that
- Auto configuration ports normally OK, you can select them if you want
- Create Schema
* Create ODS Database Schema
* Connect string, for example: myserver:1521:orcl
* SYS
* Sys_password
- OID Passwords
* ODS Schema password & confirm (all directory content)
* ODSSM Schema password & confirm (OID statistics and DIP schema)
- OID information
* Realm, for example: dc=us,dc=oracle,dc=com
* Admin user: orcladmin
* Admin password: …
- Install
- Save Summary
* Note: Weblogic Console ie: http://myhost.us.oracle.com:7001/console
Verify installation:
- …home/bin/opmnctl status -l
- Alive:
* OVD
* oidldapd
* oidldapd
* oidmon => LDAP port, LDAPS port
* EMAGENT
- ldapsearch -p LDAP_port -b “” -s base “objectclass=*” orcldirectoryversion
=> orcldirectoryversion=OID 11.1.1.3.0
Open Enterprise Manager Fusion Middleware Control 11g
* For example: http://myhost.us.oracle.com:7001/em
- Find oid1 in FMW Control
- Verify version number in FMW Control
Open Oracle Directory Services Manager
* For example: http://myhost.us.oracle.com:7005/odsm
- Connect to a directory
* OID – directory name
* User Name: cn=orcladmin
* password
- Verify OID version
After you’re done installing and configuring the OID itself, you can proceed to netca to configure the destination databases “tnsnames.ora”.
That will update sqlnet.ora and ldap.ora
Examples
LDAP.ORA:
DEFAULT_ADMIN_CONTEXT = “ou=ora,dc=company,dc=com”
DIRECTORY_SERVERS = (ldap1.company.com:389, ldap2.company.com:389)
DIRECTORY_SERVER_TYPE = OID
Oracle can “officially” only use OID or AD as LDAP servers.
The type can be OID or AD. The multiple servers are for redundancy; it will not try each one in turn. Then in SQLNET.ORA:
NAMES.DIRECTORY_PATH=(LDAP, TNSNAMES)
The means try LDAP first, then try TNSNAMES.ORA, then give up.
If you want to use a third-party LDAP server, Oracle has a product called Virtual Directory that will act as a proxy between them.

More Here

Courtesy:http://www.database.fi/2011/03/oracle-internet-directory-oid-and-weblogic-installation-on-linux/
More aboutOracle Internet Directory (OID) and Weblogic installation on Linux

Creating users in OID (Oracle Internet Directory) – Oracle Collabsuite 10g

Posted by Unknown on Thursday, January 20, 2011

Introduction:
This post is regarding creation of users in central OID (Oracle Internet Directory) instance. We call it a central because of its architecture. Usually for any business setup, there will be many instances of application and a single installation of OCS or Oracle AS. Either of these techstack is having OID as one of the component. So the users of all the instances are basically registered in this central OID instance.
So here we will see, how to create users in OID. We can create users either through UI or through command line API. We will see both the methods here.

Creating users using UI:
Navigate to the OID self service console, the URL will be in the form as given below.
http://(hostname):(infra-http-port)/oiddas
Example:
http://ap6059rt.us.oracle.com:7779/oiddas
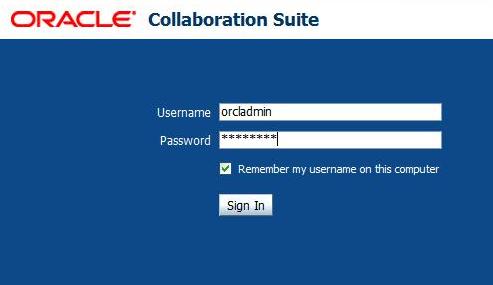
1) Click on the right hand top corner to login
1a.jpg
2) use the super user ID having all privileges to create a user. In my case its orcladmin
22.jpg
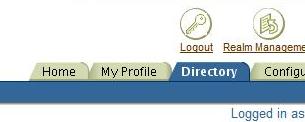
3) Once you login, click on directory tab and then click on create button
3a.jpg
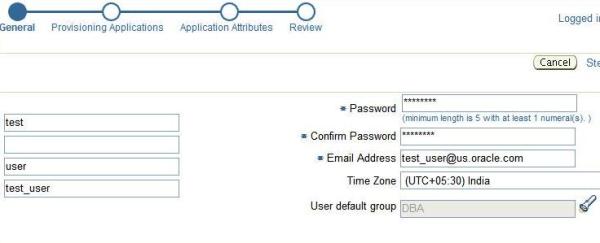
4) First screen will ask for general information. Here you need to enter password for user.
42.jpg
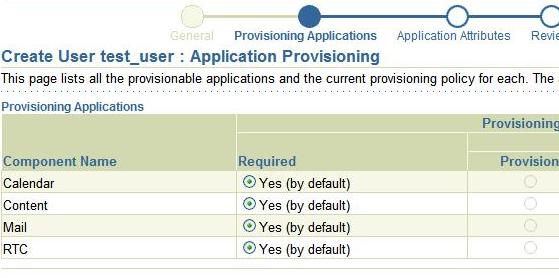
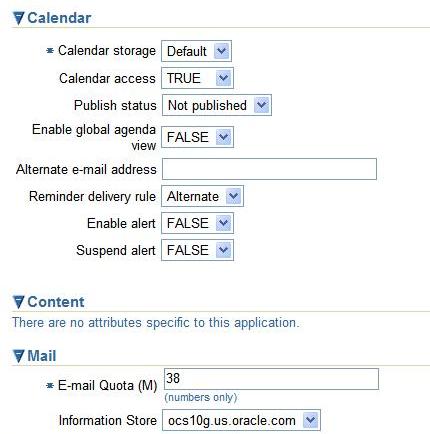
5) You can provision the various component for this user. Example in case of mail, if its provisioned, then by default a mail account will be created for user.
52.jpg
 

6) On third screen, you can check the information and also keep the default information as it is. You can also decide the quota for mail server.
62.jpg
7) Review screen. You can review and finish
If you search for the user you created you should be able to see the record.
72.jpg
Creating users using command line
You can use the following command for creating users from command line.
These commands needs to be run on the host where the OID is installed. Also make sure to source the environment before creating the user.
Example:
ORACLE_HOME=/slot03/oracle/product/ocs10g/infra
TNS_ADMIN=$ORACLE_HOME/network/admin
ORACLE_SID=ocs10g
PATH=$ORACLE_HOME/bin:$PATH
LD_LIBRARY_PATH=$ORACLE_HOME/lib:$LD_LIBRARY_PATH
export ORACLE_HOME TNS_ADMIN ORACLE_SID PATH LD_LIBRARY_PATH

Creating a user:
1. Create an ldif file called orcl.ldif that includes the following content:
      dn: cn=orcladmin, User_Search_Base
changetype: add
uid: orcladmin
mail: orcladmin
givenName: orcladmin
cn: orcladmin
sn: orclAdmin
description: Seed administrative user for subscriber.
objectClass: top
objectClass: person
objectClass: organizationalPerson
objectClass: inetorgperson
objectClass: orcluser
objectClass: orcluserV2

Example:
      cn=avdeo,cn=users,dc=us,dc=oracle,dc=com
objectclass=top
objectclass=person
objectclass=inetorgperson
objectclass=organizationalperson
objectclass=orcluser
objectclass=orcluserv2
objectclass=ctCalUser
objectclass=orclUserProvStatus
givenname=Advait
sn=Deo
orcltimezone=Asia/Calcutta
mail=advait.deo@us.oracle.com
uid=avdeo
orclactivestartdate=20080310000000z
cn=avdeo
orclisenabled=ENABLED

2. Execute the following command (the following command is one continuous line):
ldapadd -h OID_host -p non-SSL_port -D OID_superuser -w OID_superuser_password -v -f orcl.ldif
Example:
ldapadd -p 389 -h ap6059rt -D “cn=orcladmin” -w “welcome1″ -v -f test.ldif
sh-2.05b$ ldapadd -p 389 -h ap6059rt -D “cn=orcladmin” -w “welcome1″ -v -f test.ldif
do modify ****
add objectclass:
top
person
inetorgperson
organizationalperson
orcluser
orcluserv2
ctCalUser
orclUserProvStatus
add givenname:
Advait
add sn:
Deo
add orcltimezone:
Asia/Calcutta
add mail:
advait.deo@us.oracle.com
add uid:
avdeo
add orclactivestartdate:
20080310000000z
add cn:
avdeo
add orclisenabled:
ENABLED
adding new entry cn=avdeo,cn=users,dc=us,dc=oracle,dc=com
modify complete

Searching for the user:
ldapsearch uid=avdeo
sh-2.05b$ ldapsearch uid=avdeo
cn=avdeo,cn=users,dc=us,dc=oracle,dc=com
objectclass=top
objectclass=person
objectclass=inetorgperson
objectclass=organizationalperson
objectclass=orcluser
objectclass=orcluserv2
objectclass=ctCalUser
objectclass=orclUserProvStatus
givenname=Advait
sn=Deo
orcltimezone=Asia/Calcutta
mail=advait.deo@us.oracle.com
uid=avdeo
orclactivestartdate=20080310000000z
cn=avdeo
orclisenabled=ENABLED

Deleting users from LDAP:
ldapdelete -p non-SSL_port -h OID_host -D OID_superuser -w OID_superuser_password username

More Here


Courtesy:http://avdeo.com/2008/03/11/creating-users-in-oid-oracle-internet-directory-oracle-collabsuite-10g/
More aboutCreating users in OID (Oracle Internet Directory) – Oracle Collabsuite 10g

Oracle Internet Directory (OID)

Posted by Unknown

Oracle Internet Directory (OID)
Oracle Internet Directory (OID) is an LDAP server which uses an Oracle database as a datastore. In this article I will demonstrate the basic steps necessary to set up OID as a replacement for local Oracle Net configuration files and Oracle Names Server.
Installation
The OID software should be installed as follows:
  • Start the the Oracle Universal Installer (OUI).
  • On the Welcome screen click the Next button.
  • On the File Locations screen select the appropriate ORACLE_HOME and path then click the Next button.
  • On the Available Products screen select the Oracle9i Management and Integration option then click the Next button.
  • On the Installation Types screen select the Oracle Internet Directory option then click the Next button.
  • On the Using an existing instance screen select the Yes option then click the Next button.
  • On the Database Identification screen enter the Global Database Name and SID for the database instance which will act as the datastore then click the Next button.
  • On the Database File Location screen enter an appropriate path then click the Next button.
  • On the Summary screen click the Install button.
  • Once the Oracle Internet Directory Configuration Assistant is complete (see below) click the Exit button.
OID Configuration Assistant (OIDCA)
The OID Configuration Assistant starts during the software installation. If anything goes wrong during the configuration stage you can repeat the configuration by:
  • Start the OID Configuration Assistant - $ORACLE_HOME/bin/oidca.bat
  • On the Welcome screen click the Next button.
  • On the Menu screen select the OID Configuration of a Database option then click the Next button.
  • On the Database Information screen enter the Database SID, SYSTEM password and Database Listener Port for the database instance which will act as the datastore then click the Next button.
  • On the Oracle Internet Directory Credentials screen enter an OID Super-user Password and alter the port settings if necessary then click the Next button.
  • Depending on the server the OID Configuration will take between 10-20 minutes.
  • On the End of OID Configuration screen click the Exit button.
The OID Configuration Assistant will start the OID Monitor and OID Server Instance automatically. The following two sections explain how to manage these services from the command line.
Start/Stop OID Monitor Using OIDMON

When using the command line tools the ORACLE_HOME and ORACLE_SID environment variables should be set:
Rem NT/2000
set ORACLE_HOME=C:\Oracle\920
set ORACLE_SID=W2K1
#UNIX
export ORACLE_HOME=/u01/app/oracle/product/9.2.0
export ORACLE_SID=W2K1
The OID Monitor can be started and stopped from the command line using the following commands:
oidmon connect=W2K1 start
oidmon connect=W2K1 stop

Start/Stop a Server Instance Using OIDCTL
Once the OID Monitor is running an OID Server Instance can be started and stopped using the following commands:
oidctl connect=W2K1 server=oidldapd instance=1 configset=1 start
oidctl connect=W2K1 server=oidldapd instance=1 configset=1 stop
oidctl connect=W2K1 server=oidldapd instance=1 configset=1 restart
Reset the Default Database Password
With the OID Monitor and the OID Server Instance running the default database password can be altered using the oidpasswd utility:
oidpasswd connect=W2K1
current password: ods
new password: password
confirm password: password
password set.
Oracle Net Manager
The Oracle Net Manager can be used to perform entry management within OID:
  • Start up the Oracle Net Manager.
  • Expand the Directory node.
  • Click on Service Naming node and press the + button.
  • On the Directory Server Authentication dialog enter the correct user and password (cn=orcladmin/password) and click the OK button.
  • Add the service and test it in the same way you would add a local naming service using the Net Manager.
  • Exit Oracle Net Manager.
Oracle Directory Manager
The Oracle Directory Manager is the main directory administration tool. In this case we will use it to check that the Oracle Net Manager has entered our connection information into the directory:
  • Start the Oracle Directory Manager.
  • Log into the OID Server Instance using the correct user (cn=orcladmin), password, server and port (389).
  • Expand the Entry Management node.
  • Expand the cn=OracleContext node.
  • Listed under this node will be an entry (cn=Service) for each service configured by the Oracle Net Manager.
  • Exit the Oracle Directory Manager.
Oracle Net Configuration Assistant
With the OID configured and the appropriate entry management defined we can configure client machines to use the OID for all TNS lookups:
  • Start up the Oracle Net Configuration Assistant.
  • Select Directory Usage Configuration option then click the Next button.
  • Select the first option (Select the directory server you want to use. The directory server must already be configured for Oracle usage.) then click the Next button.
  • Select a Directory Type of Oracle Internet Directory then click the Next button.
  • Enter the name of the directory server and adjust the ports if necessary then click the Next button.
  • Select cn=OracleContext and click the Next button.
  • Click the Next button to confirm the action.
  • Click the Finish button.
The Oracle Net Configuration Assistant creates an ldap.ora file in the ORACLE_HOME/network/admin directory which identifies the OID server as the source of all TNS lookups. The ldap.ora file contains the following information:
DEFAULT_ADMIN_CONTEXT = “”
DIRECTORY_SERVERS = (ldap-server:389:636)
DIRECTORY_SERVER_TYPE = OID
The following entry in the sqlnet.ora file may prevent timeouts by sending requests directly to the OID instead of following the default search path:
NAMES.DIRECTORY_PATH = (LDAP)
Once all client machines are configured correctly any modifications to the TNS lookups can be done from a central location reducing the amount of client machine administration.

More Here


Courtesy:http://annurachu.wordpress.com/2010/03/17/oracle-internet-directory-oid/
More aboutOracle Internet Directory (OID)